As is traditional at Christmas here at DefProc, we attempt a small project to build a new fun, festive item. While this is spuriously titled as a 5 minute project, they typically take a few days to pull everything together.
We've previously done projects such as the cheertree, using the Cheerlights protocol for globally synchronised Christmas lights, and I still really like this as an easy way to get internet input to something that is also being used by others around the world. But we've already built tree structures, and even run light strings up the centre of a full size tree.
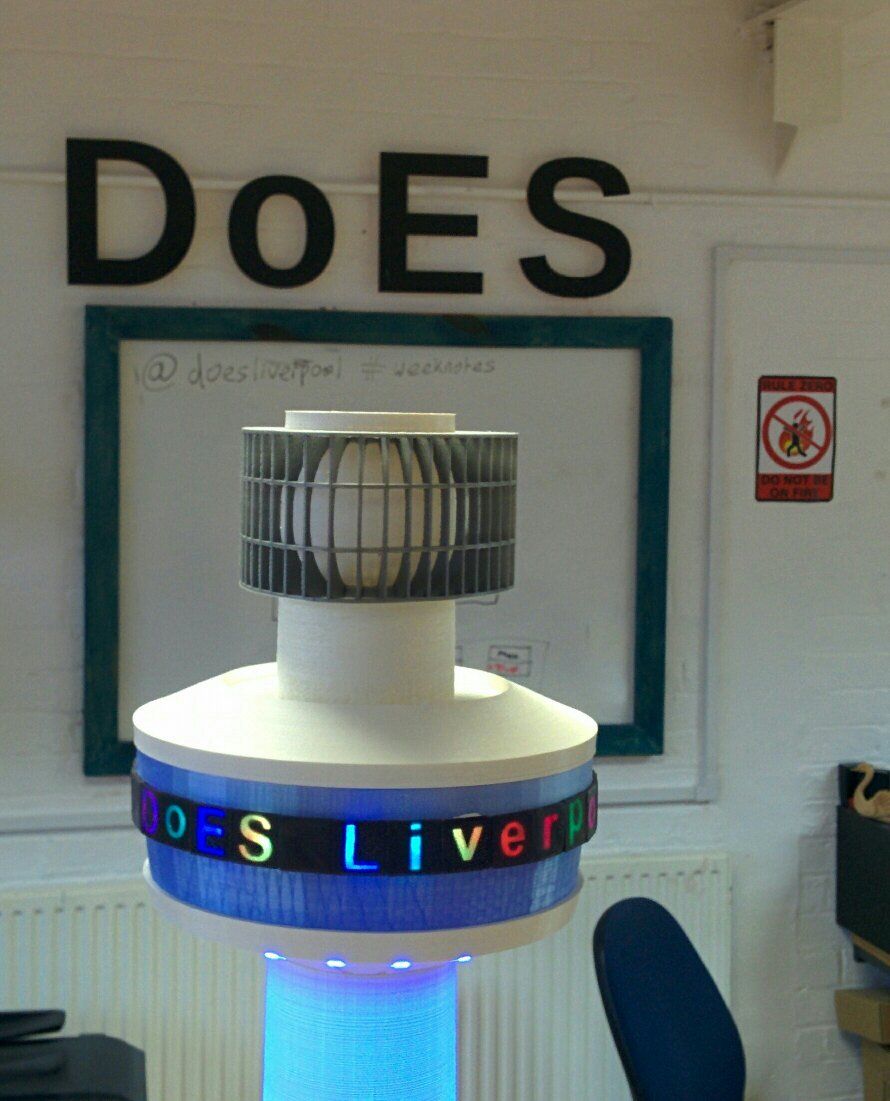
This year, we've taken the DoES Tower — normally twitter controlled through its own account @DoES Tower — and included the cheerlights protocol to make a festive addition to the office in DoES Liverpool.

Control
The DoES Tower has 3 sets of addressable RGB LED strings inside (actually WS2812b based strip, which is the same as off-brand Neopixels), two sit behind the letter blocks that spell out "DoES Liverpool" around the circumference of the tower cupola and the third that faces downwards through floodlight holes that are present on the full size tower. Inside, an Arduino Uno and WiFi shield cycle through a lovely set of random colour changes for the letters, and read an MQTT stream and set the downlight colours to the retreived hex value.
Having an MQTT stream means that the Arduino gets push messaging, and is much more flexible that reading the Cheerlights page regularly, because any of the 16 million possible colour combinations can be set directly via MQTT, rather that relying on rapid polling of the 9 colours available from Cheerlights.
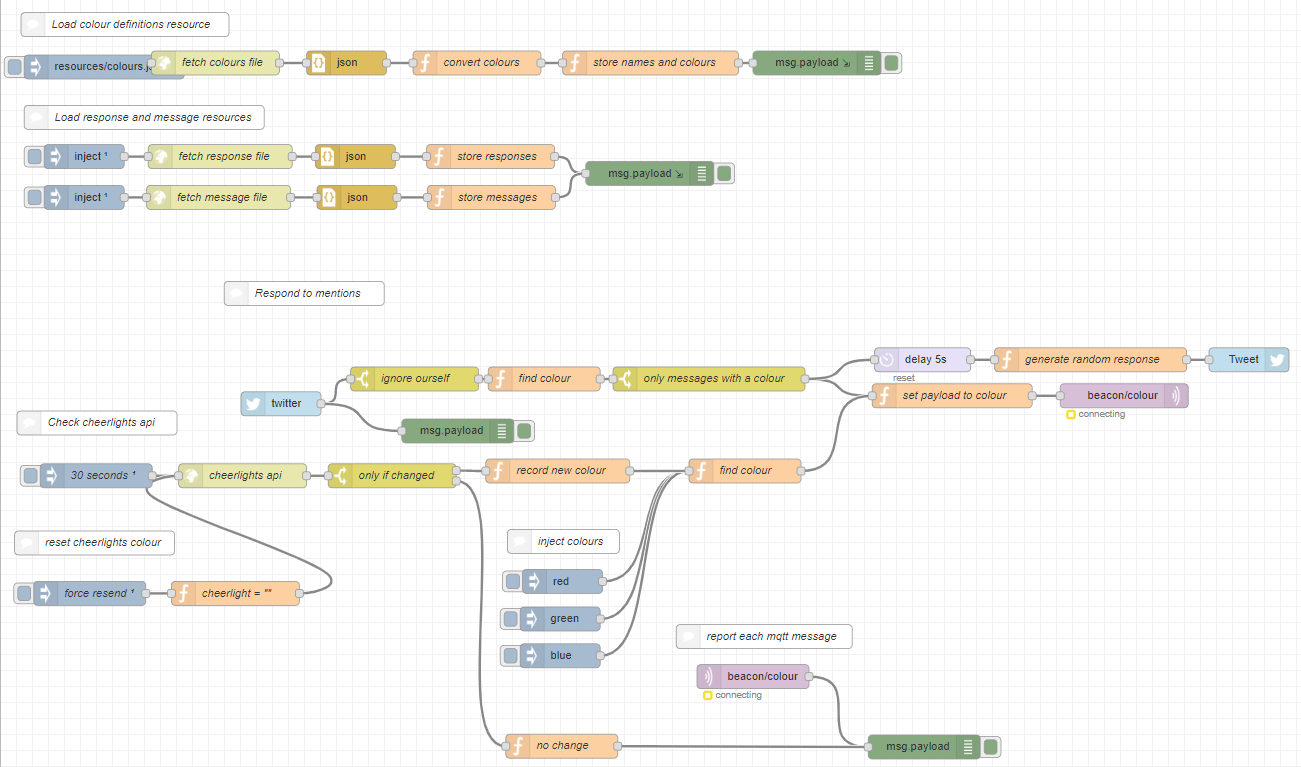
To perform the actions of checking the twitter stream for messages, setting the MQTT colour, taking pictures of the tower and then replying to incoming tweets is not handled by the Arduino on board. Instead, a Raspberry Pi that is physically nearby runs a node-red flow. This means the logic is handed by a small computer, rather than being shoehorned into a small microcontroller, and the tower acts as a device that just sets the colour it's instructed to, and the programming logic is handled elsewhere.
Making Cheerbeacon
Other that replacing the Arduino WiFi shield with a spare — as the 3.3V regulator on the board had burned out in use(!) — I didn't want to change anything in the tower or tower firmware. The original firmware from @brettlempereur is already fantastic, and does everything that's needed from the tower.

Instead, I adjusted the original node-red flow to change the program logic. As we're not at a show, I removed the image code, and added in a regular check of the cheerlights api page to forward any of the cheerlights changes to the same MQTT feed that the Tower normally listens to. And just for testing, added a few inject nodes to be able to locally set the colour to red, green or blue.
Because this is MQTT, the tower gets a push message every time the broker gets an updated message, and this happens immediately. This is unlike the cheerlights, where the lights will only update when the controller next polls the cheerlights api page.
If you'd like to use the same MQTT feed (with no guarantees of uptime), the settings are stored in the Arduino sketch file:
MQTT_ID = "arduino-beaconbot";
MQTT_SERVER = "m20.cloudmqtt.com";
MQTT_PORT = 11475;
MQTT_USER = "arduino";
MQTT_PASSWORD = "arduinopassword";
MQTT_TOPIC = "beacon/colour";
The flow downloads the colour definitions and response messages from github, so I also uploaded messages in the beaconbot repo to make it more #cheerlights related.
The flow is available to import directly from the beaconbot github repo.
