
Welcome The Things Conference UK workshop participants, and others on the internet. This workshop guide is designed to let you start from very simple beginnings, and take you through creating a simple temperature sensor that sends data at regular intervals through to The Things Network via LoRaWAN.
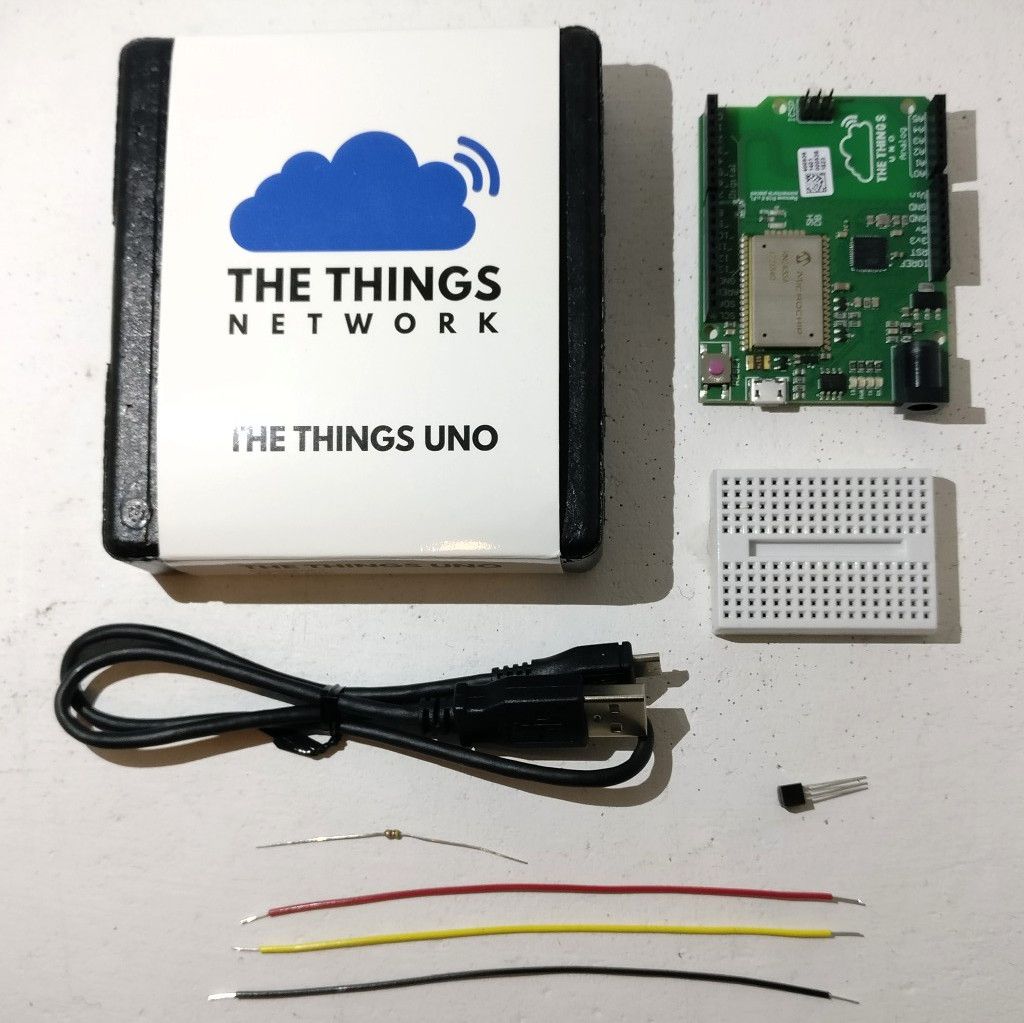
You will need:
- A computer with the Arduino software installed,
- A Things Uno (or similar), Arduino compatible board with a LoRaWAN modem attached. The Things Uno comes with a USB cable to connect to the computer, otherwise you may need your own.
- A DS18B20 One-Wire Temperature sensor to connect to the arduino
- A 4.7k resistor is recommended for power stability for the One-Wire sensor..
- A small breadboard to connect all the components into.
- 3 jumper wires, one red, one black, and one another colour of your choice (yellow in this guide). Ensure that they're long enough to reach beween the Arduino ports around the side, and the breadboard you're using.
- To be in an area with LoRaWAN coverage from The Things Network (if you're at The Things Conference UK, you will have plenty of coverage!).
Circuit construction
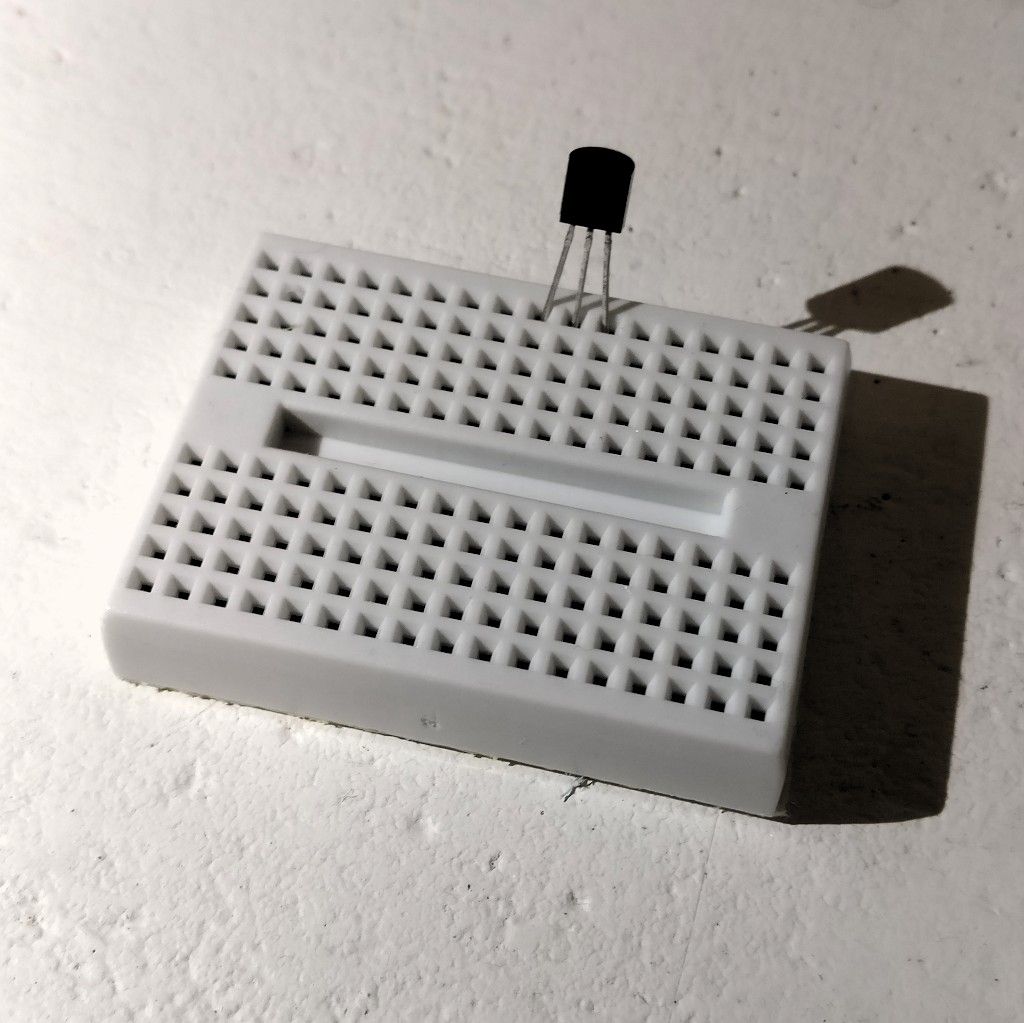
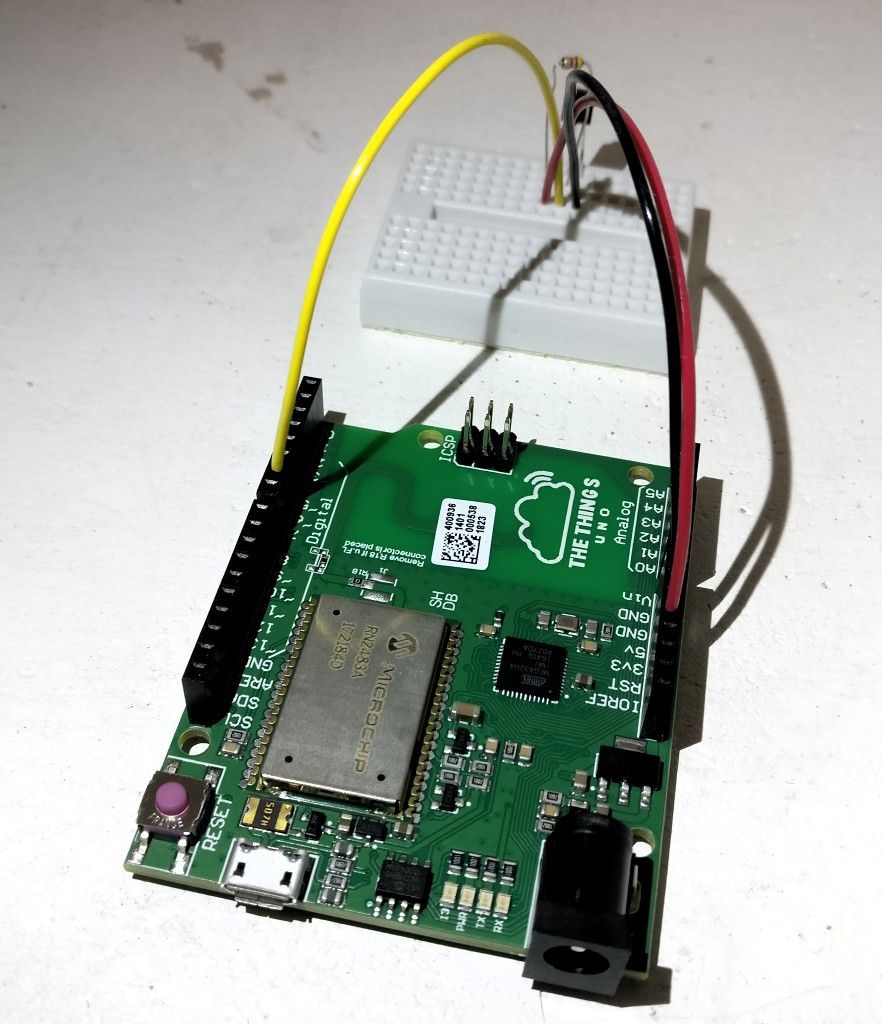
With the arduino software installed, and the all the parts available, place the DS18B20 temperature sensor into the breadboard.
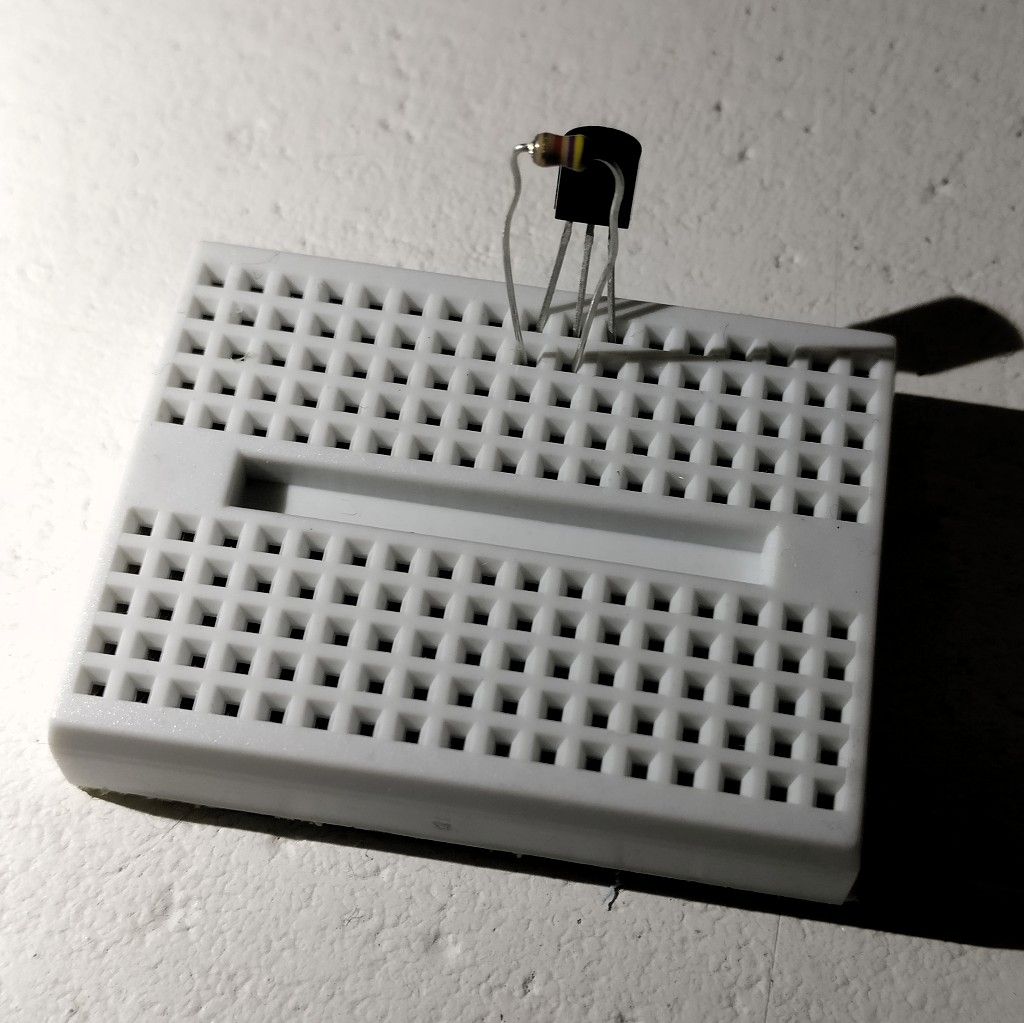
Connect the 4.7k resistor between pin 2 and pin 3 of the temperature sensor.
Connect a red jumper wire to pin 3, a black jumper wire to pin 1, and the other jumper wire (pictured in yellow) to pin 2.
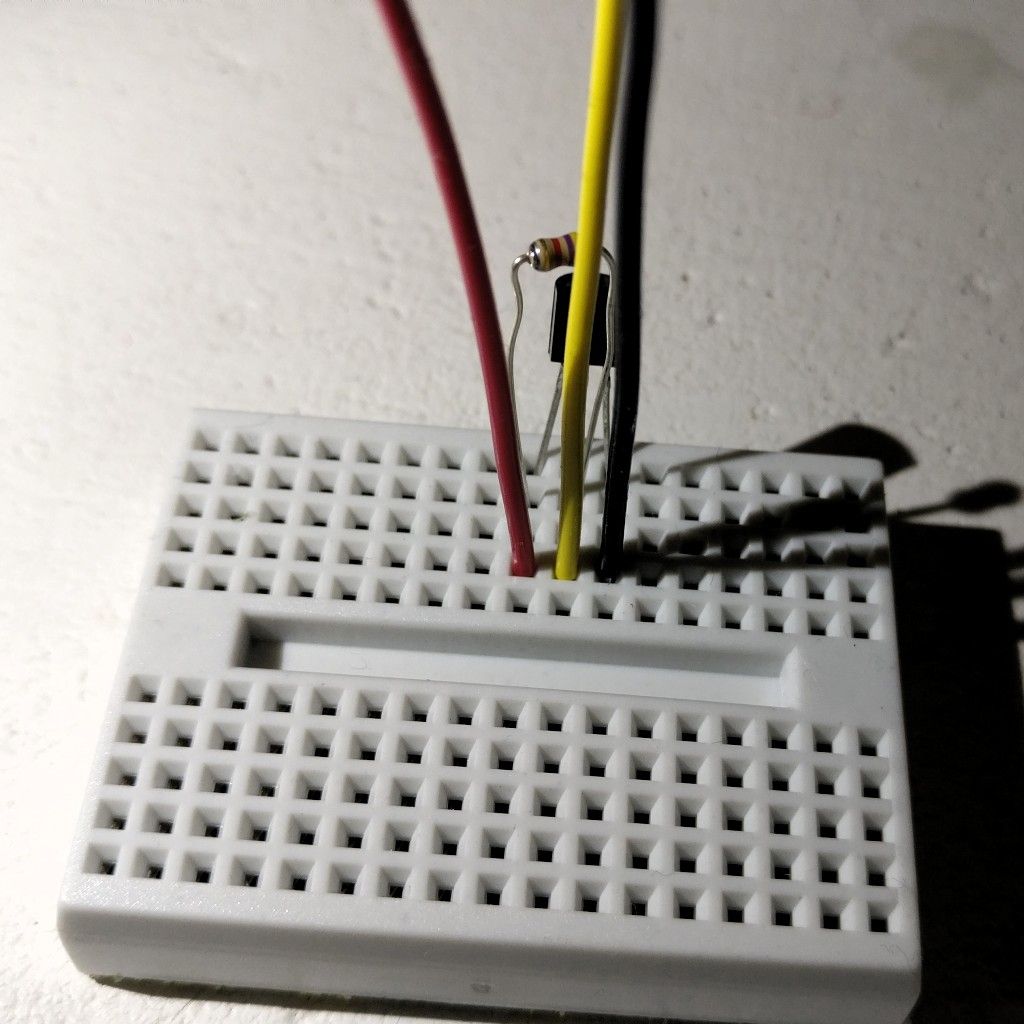
Pin 1 is Ground on the temperature sensor, so connect the other end of the black wire to a GND port on the Things Uno.
Pin 2 is the Data line on the temperature sensor, so connect the yellow jumper wire to Digital pin 6 on the Things Uno.
Pin 3 is the power line on the temperature sensor, so connect the red wire to the 5V port on the Things Uno.
Installing the Software and libraries
Install the Arduino IDE if it isn't already, and open a new window.
Then install the following Arduino libraries in the IDE from the top menu, by following: Sketch → Include Library → Manage Libraries → The Things Network → install and typing each library name into the serch box. Click install for each choice before repeating with the next.
Then you're ready to start programming.
Connecting to The Things Network
Because each device on LoRaWAN needs to be authenticated with the service and application that we will be sending to, you will need to know the unique ID number of the device that you're using now - its DeviceEUI.
To get your device to report the radio ID, copy and paste the following in to a new Arduino sketch, and upload to the board.
#include <TheThingsNetwork.h>
#define lora Serial1

#define debugSerial Serial
#define loraSerial lora

TheThingsNetwork ttn(loraSerial, Serial, TTN_FP_EU868);

void setup()
{
  debugSerial.begin(115200);
  loraSerial.begin(57600);
  delay(1000);
}

void loop()
{
   debugSerial.println("Device Information");
   debugSerial.println();
   ttn.showStatus();
   debugSerial.println();
   debugSerial.println("Use the EUI to register the device for OTAA");
   debugSerial.println("-------------------------------------------");
   debugSerial.println();
   delay(10000);
}
Ensure the board is set to be an Arduino Leonardo (from Tools → Board), and the port is set correctly once the Things Uno board is plugged in (from Tools → Port, select the Arduino in the list).
Once uploaded, open the serial monitor (click the magnifying glass in the top right of the Arduino IDE window). Check that the baud rate (from the drop down box in the bottom right of the serial monitor window) is set to 115200. Then the device EUI should be printed out in the window.
Then create a TTN application and register your device:
- Make an account on The Things Network,
- go to the TTN console
- select
applicationsand+ add application - Set
- Description (a name to describe the application to yourself later),
- Handler registration to
ttn-handler-eu
- From your application page,
+ register device- Device ID (a name to describe this device to yourself later),
- Device EUI (copy and paste from the serial monitor),
Test the LoRaWAN connection
Before adding the temperature sensor, the sketch below will send a single value to over LoRaWAN that you can watch on the TTN Console connetion to verify that your device is actually making a connection to The Things Network.
In a new sketch window, copy and paste the following code:
#include <TheThingsNetwork.h>

// Set your AppEUI and AppKey
const char *appEui = "0000000000000000"; // replace with your `App EUI`
const char *appKey = "00000000000000000000000000000000"; // replace with your `App Key`

#define lora Serial1
#define debugSerial Serial
#define loraSerial lora

TheThingsNetwork ttn(loraSerial, Serial, TTN_FP_EU868);

void setup()
{
   debugSerial.begin(115200);
   loraSerial.begin(57600);

   // Wait a maximum of 10s for Serial Monitor
   while (!debugSerial && millis() < 10000);

   debugSerial.println("-- STATUS");
   ttn.showStatus();

   debugSerial.println("-- JOIN");
   ttn.join(appEui, appKey);
}

void loop()
{
   debugSerial.println("-- LOOP");

   // Prepare payload of 1 byte to indicate LED status
   byte payload[1];
   payload[0] = (digitalRead(LED_BUILTIN) == HIGH) ? 1 : 0;

   // Send it off
   ttn.sendBytes(payload, sizeof(payload));

   delay(10000);
}
To make this device send data to your new application, and not anyone else's, you will need to change the two lines to match your own device setting for the application:
const char *appEui = "0000000000000000";
const char *appKey = "00000000000000000000000000000000";
Each application has a unique appEui, and each device on each application has a unique appKey. These are used to authenticate and verify each device against its deviceEui when it performs its join request to the LoRaWAN network. If successful, these are also used derive the unique session keys that encrypt all the traffic sent from the device to TTN application.
This information is available from the TTN Console page for the chosen application. Follow Devices → [click on a device] → settings shows the AppEUI and AppKey. Copy and paste the values for the device you just created into the sketch, and upload to the board.
You can watch the data being sent on the serial monitor, and being received on the data tab of the TTN Console for your application.
Send Temperature
With the connection to the application confirmed, the next step is to send the readings from the temperature sensor, and set the TTN application to decode the values into JSON to make reading easier, and to allow them to be passed on to another service.
This example uses the Cayenne LPP format so it can be recreated back into a JSON objects without having to do any custom float to byte array translation or javascript re-building. You can also create your own encoding and decoding schemes dependent on your application requirements.
To decode each message when received in the TTN Console, set the Payload Formats to be CayenneLPP from the dropdown.
Copy and paste the following code in to a new Arduino sketch, changing the appEui and appKey to the same values as used in the previous sketch.
#include <TheThingsNetwork.h>
#include <CayenneLPP.h>
#include <OneWire.h>
#include <DallasTemperature.h>

// Set your AppEUI and AppKey
const char *appEui = "0000000000000000";
const char *appKey = "00000000000000000000000000000000";

// Data wire is plugged into port 6 on the Arduino
#define ONE_WIRE_BUS 6

#define lora Serial1
#define loraSerial lora
#define debugSerial Serial

TheThingsNetwork ttn(loraSerial, debugSerial, TTN_FP_EU868);
CayenneLPP lpp(51);

// Setup a oneWire instance to communicate with any OneWire devices (not just Maxim/Dallas temperature ICs)
OneWire oneWire(ONE_WIRE_BUS);

// Pass our oneWire reference to Dallas Temperature.
DallasTemperature sensors(&oneWire);

// arrays to hold device address
DeviceAddress deviceAddress;

void setup()
{
   debugSerial.begin(115200);
   loraSerial.begin(57600);

   // Wait a maximum of 10s for Serial Monitor
   while (!debugSerial && millis() < 10000);

   // Get device address
   if (!sensors.getAddress(deviceAddress, 0)) Serial.println("Unable to find address for Device 0");

   // set the resolution to 9 bit (Each Dallas/Maxim device is capable of several different resolutions)
   sensors.setResolution(deviceAddress, 12);

   debugSerial.println("-- STATUS");
   ttn.showStatus();

   debugSerial.println("-- JOIN");
   ttn.join(appEui, appKey);
}

void loop()
{
   debugSerial.println("-- LOOP");

   // get the current temperature
   sensors.requestTemperatures();
   float degC = sensors.getTempC(deviceAddress);
   debugSerial.println(degC, 6);

   lpp.reset();
   lpp.addTemperature(1, degC);

   // Send it off
   ttn.sendBytes(lpp.getBuffer(), lpp.getSize());

   delay(30000);
}
New messages should appear in the applicaton, and the incoming data should show a "temperature_1": 00.0 in the processed payload. This then appears as a value:key pair in any JSON messages that are passed on to other services.
External Data
While there is a specific workshop during The Things Conference UK 2018 on this topic, there are some services that connect very easily to The Things Network, especially for dashboards. While the conference workshop with Dave Mee focusses on Node-Red, the myDevices Cayenne service (of CayenneLPP fame) is an easy first step, if ultimately less flexible.
Creating a myDevices Cayenne dashboard:
- Ensure the 'Payload Format' in the TTN application is set to 'CayenneLPP',
- create an account at myDevices Cayenne
Add new→Devices & Wigets→LoRa (beta)→The Things Network→Cayenne LPP- Enter the
Device EUIfrom the TTN console, - Back on the TTN console for the application →
Applications→+ add integration→ chooseCayenne,- Enter a
Process IDof your choice (anything), - Select an
Access Key(one of the allowed MQTT passwords on the application to pass to Cayenne)
- Enter a
- new data from this device will automatically propogate to myDevices Cayenne, so entries for
temperature,RSSIandSNRfor this device will appear when it next sends.