The first set of lattice hinge tests I generated were a little fragile, with the maximum stress in the torsional links set to be 60MPa (the yield stress of the acrylic) it's not very surprising that, with acrylic being a very brittle material (where the ultimate/breaking stress is very close to the yield stress) that the samples were very easy to break.
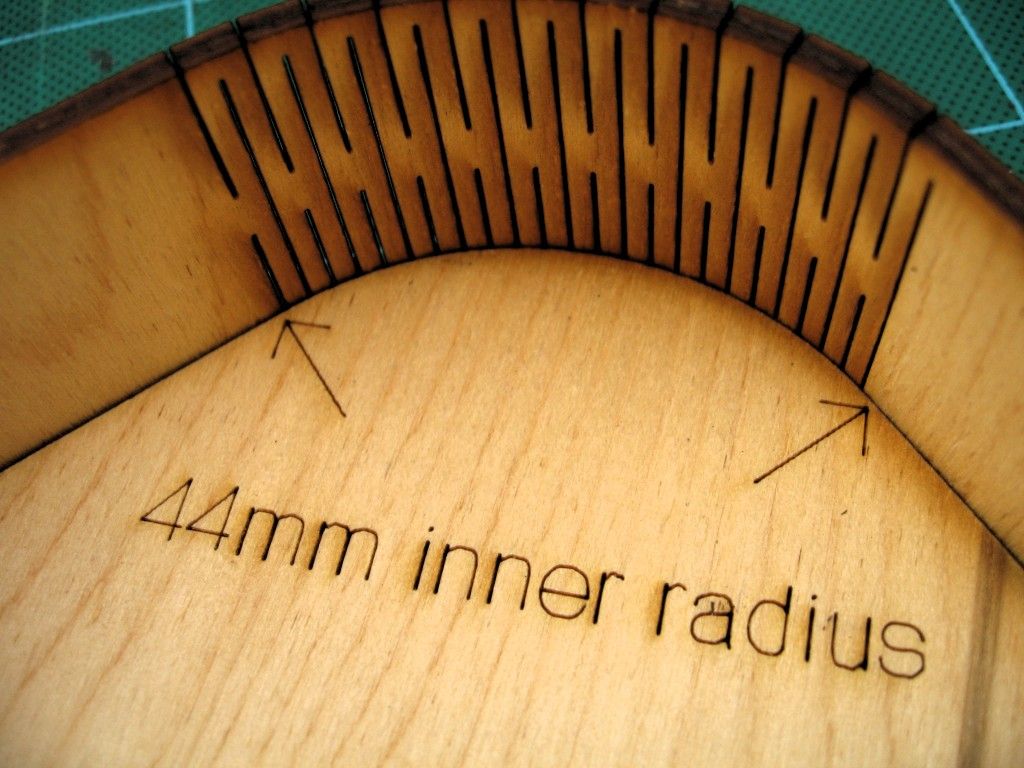
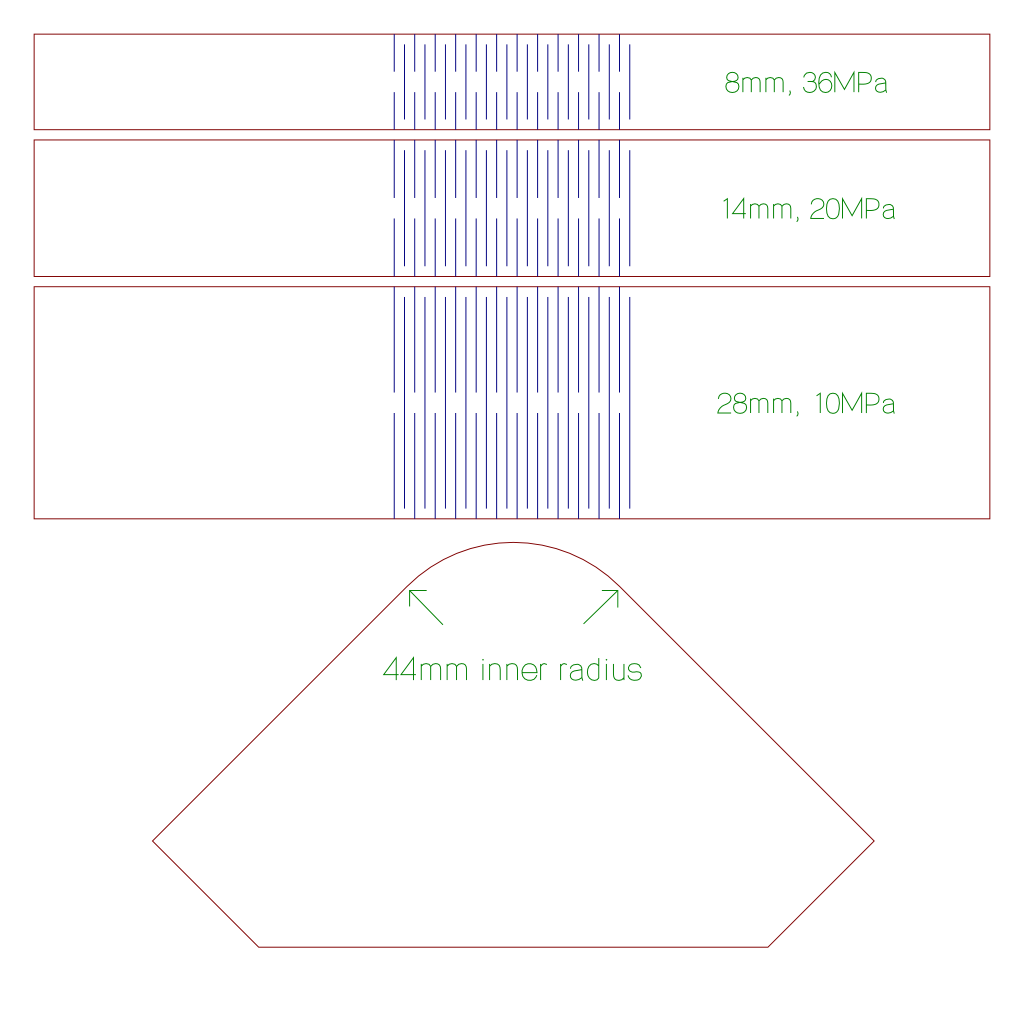
For a 90 degree bend in a 3mm thick sheet of acrylic with 3mm wide links, 23 torsional links are needed if the laser kerf is 0.2mm. This will form a bend with a 44mm internal radius. The minimum length of link (rounded up to the nearest mm for simplicity) is dependant on maximum allowed torsional stress:

- For \( \tau_{allowed} = 36 \)MPa, \( l = 8 \)mm;
- For \( \tau_{allowed} = 20 \)MPa, \( l = 14 \)mm;
- For \( \tau_{allowed} = 10 \)MPa, \( l = 28 \)mm.
To test this, I've produced a cut file for the hinges with the three sizes of link. Included is a arc of 44mm radius to act as a guide for the calculated internal radius of each lattice hinge bend.
The SVG file is linked below if you'd like to cut your own. Or if you'd like these samples but you don't have access to a laser cutter at the moment, or you normally send away for samples, Lattice Hinge Test 2 is also available to purchase from Ponoko.
Acrylic is Brittle
If lattice hinges are to be used practically — especially in a consumer product — then they need to be much more robust to undesirable handling. Someone who has no knowledge of the expected performance of a lattice hinge, and no expectation of the maximum angle that the bend is designed for, will happily abuse a sample that you put in there hands and be quite surprised when it suddenly snaps in their hand! Of course, if you're designing a more robust lattice hinge, then giving samples to people and letting them break them gives you valuable information on how a customer might expect the hinge to perform; and they seem to expect that (for a sample with a single hinge) it should be able to bend over 180 degrees and touch the two ends of the sample together. This happens even if you warn the test subject that the structure is fragile. It's not a bad thing, it's about understanding what the hinge needs to be able to deal with in practice without failing.
In addition to understanding about how a hinge might be mistreated once it leaves the manufacturers, it's also worth taking into account some of the lesser features of the elastic properties of acrylic. The maximum stress carrying capability of acrylic is both rate and temperature dependant; this means that changes to the speed of loading or the temperature of the material.
As a thermoplastic, acrylic becomes softer (less brittle and more ductile) when it is heated and this means it can undergo greater deformation before breaking. Similarly, when the temperature of the material is below room temperature (20°C — the reference temperature for testing material properties) then the acrylic can fail below the nominal 60MPa yield stress limit.
Speed of loading also makes a difference similarly. Faster loading will cause the acrylic to fail at a lower stress, as the yield stress value for materials is given for quasi-static loading (loaded so slowly that it can be assumed that load is not changing over time). While all materials are rate dependant, it's much more noticeable for brittle materials because the maximum strain (deflection) of the material before breaking is small.
So, while the images from the last set of lattice hinge tests show I was able to bend most of them to 90 degrees without breaking, I only managed it by bending them very slowly in a warm room.
Test Samples
This new set of test samples is using 3 maximum stress levels to look at their effect on how robust the hinge junction is in practice:
- 36MPa — While this is sample should be much more robust than the first set, this is still likely to break if mistreated, and will not make much beyond 90 degrees.
- 20MPa — Better than the 36MPa sample, this one should easily bend to 90 degrees, but may break if the sample is bent to 180 degrees, especially if the sample is cool.
- 10MPa — More robust again, this should bend comfortably to touch both ends of the sample together, but is noticably less stiff than the 20MPa sample.

Knowing from the last post that there are a minimum number of links for a bend when the width of the space between the links is known, so the minimum length of link can be calculated to control the maximum torsional stress in the links using:
\[ l = 0.676125 \times \frac{\Theta G t}{\tau_{allowed} n} \]
For a 90 degree bend in a 3mm thick sheet of acrylic with 3mm wide links, 23 torsional links are needed if the laser kerf is 0.2mm. This will form a bend with a 44mm internal radius. The minimum length of link (rounded up to the nearest mm for simplicity) is dependant on maximum allowed torsional stress:
- For \( \tau_{allowed} = 36 \)MPa, \( l = 8 \)mm;
- For \( \tau_{allowed} = 20 \)MPa, \( l = 14 \)mm;
- For \( \tau_{allowed} = 10 \)MPa, \( l = 28 \)mm.
To test this, I've produced a cut file for the hinges with the three sizes of link. Included is a arc of 44mm radius to act as a guide for the calculated internal radius of each lattice hinge bend.

If you'd like these samples but you don't have access to a laser cutter at the moment, or you normally send away for samples, Lattice Hinge Test 2 is available to purchase from Ponoko.
Nomenclature
- \(\Theta\) = Total bend angle of the piece (\(\Theta = \theta \times n\))
- \(\theta\) = Angle of twist per link (radians) (\(90° = \frac{\pi}{2}\) radians)
- \(k\) = Clearence gap (m)
- \(k_{laser}\) = Laser Kerf (m)
- \(l\) = Torsional link length (m)
- \(n\) = Number of columns of torsional links
- \(t\) = Material thickness (m)
- \(G\) = Torsional Modulus of the material (Pa)
- \(\Theta\) = Total bend angle of the piece (\(\Theta = \theta \times n\))
- \(\theta\) = Angle of twist per link (radians) (\(90° = \frac{\pi}{2}\) radians)
- \(\tau\) = Torsional Stress (Pa)
