Recently at DefProc there's been a shift towards organising, a late 'spring clean' if you will. As more projects get taken on, more parts and bits appear around the office and there comes a point where you're hunting around for a particular thing and you realise that enough is enough!
So, with that in mind, Alex and Pat set out to organise all the stock using partsbox.io. For more information on how they went about it, a handy guide from partsbox themselves explains it perfectly.
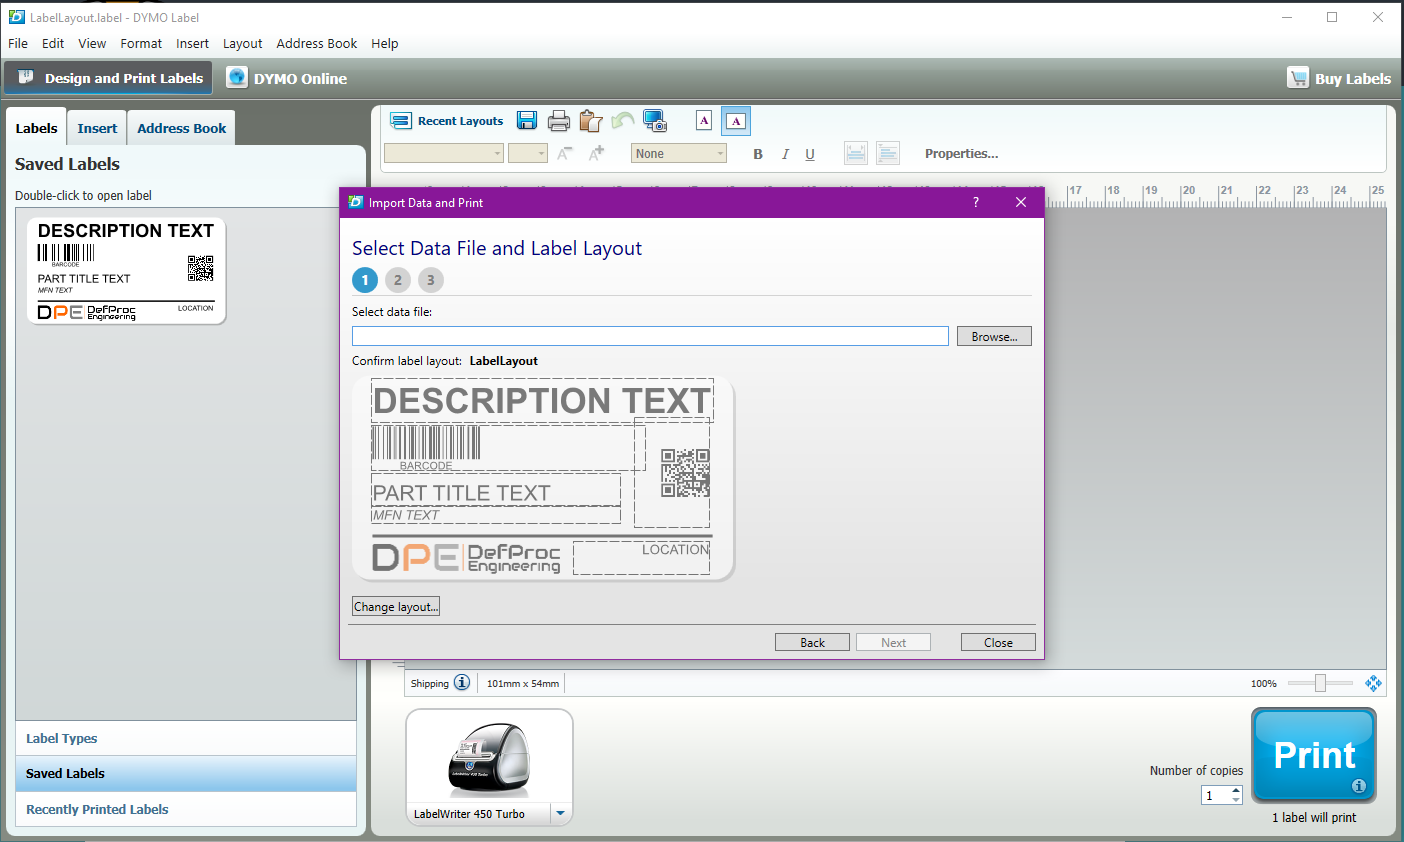
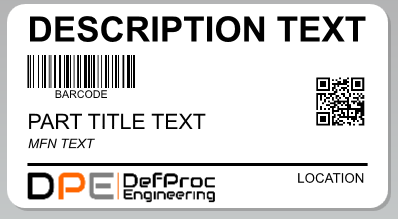
Part of the new storage plan is labelling all the components with a custom printed label that contains the relevant information for us, including a QR code that when scanned responds with the partsbox URL for that particular part so you can immediately view all the information on it. The problem with this, and the Dymo label printer, is the software for it... isn't great. It's clunky to use and more importantly it's a hassle trying to get it to automate printing labels. Partsbox lets you download a CSV file containing all the information about the selected parts, so ideally we wanted a way to import the CSV and have the Dymo print out a label for each part, no fuss!
The software that comes with the printer does include a way to print from a CSV file, but it requires importing it and going through a wizard each time. By automating it we could save time on not selecting the correct paper-size and printer, going through a wizard and assigning data to label fields etc.

So lets discuss how we can automate our printing! Since August 2016, the Dymo Label Web Service is automatically installed along with the Dymo Label Software. Using this web service we can talk directly to the printer.
So first;
- Install the Dymo Label Software and Dymo Label Web Service.
- Save a copy of the Dymo JavaScript Framework.
You can check if you have the web service correctly installed by following this blog post from Dymo themselves. (Sadly this is for Mac and Windows only as Linux is not supported).
The SDK, SDK documentation and framework overview aren't great from Dymo and commonly are either outdated or don't work. The very few examples it gives for JavaScript aren't event complete. The one reference that does have some benefit is the documentation for the JavaScript framework we downloaded. With that in mind, we should be able to get this printing.
The first step is we need a layout for the label. This is the only time we have to open up and use the included software. Well, it's not required but it is easier if you don't fancy writing out all the layout XML yourself. Opening the 'Dymo Label v.8' and selecting a label type / size, you're ready to add the components you need.

One important step here is that each component of the label needs a reference name setting. This can usually be found by right clicking > properties > advanced. Here I would advise that you preface each of the reference names with a constant in case you need to search through the XML for adjustments. Additionally make a note of these as you'll need the reference names later.

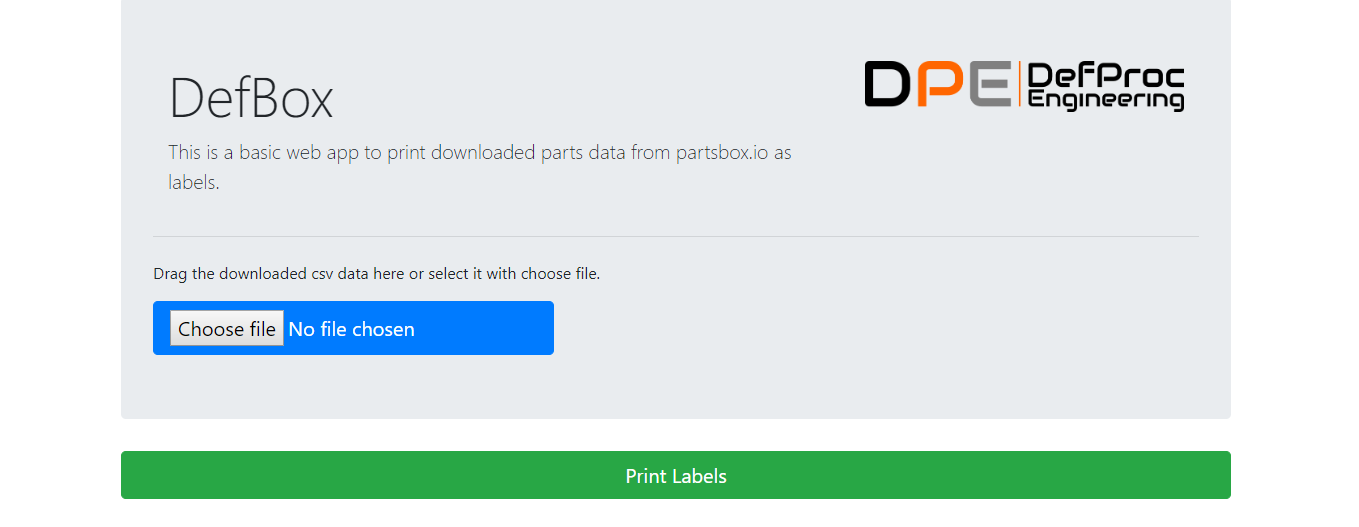
After the layout is done save it somewhere safe so we can import it later and close down the Dymo software. From here we can start creating our process for printing the labels. As we're using the web service pack we're going to create a basic web page (styling can be saved for another day). On the page a user can import or drag a downloaded CSV file from partsbox and then upon clicking the print button the page prints a label for each part included in the CSV. No pop up menus, no selecting the right printer, no import wizards. Just plug and print!
Because the web page is talking to a locally plugged in printer, this won't work if hosted online (security issues). Instead I recommend having the web page hosted on GitLab and then if changes are made the user can pull the latest version before opening the page locally in their browser.
For the basic web page I created a single html file. At the top I imported Bootstrap for some very quick and easy styling (optional) and then imported two JavaScript files, the first being the download Dymo framework from earlier and the second being a custom JavaScript file where we will write our code to tie it all together.
<!DOCTYPE html>
<html>
  <head>
    <title>DefBox</title>
    <link rel="stylesheet" href="./assets/css/Bootstrap.min.css">

    <script src="./assets/js/jquery-3.4.1.min.js" type="text/javascript" charset="UTF-8"></script>
    <script src="./assets/js/bootstrap.bundle.min.js" type="text/javascript" charset="UTF-8"></script>
    <script src="./assets/js/DYMO.Label.Framework.latest.js" type="text/javascript" charset="UTF-8"></script>
    <script src="./assets/js/defbox.js" type="text/javascript" charset="UTF-8"></script>
  </head>
For the body, I used a Jumbotron from Bootstrap and after adding a title, subheading and logo it was mostly done in terms of layout and styling. I finished it off with a file input so we can get access to the CSV file with an id of partsbox_csv_file so we can access it later from the custom JavaScript, and a button with an on click call to CheckEnv(), our first function.
  <body>
    <div class="container">
      <div class="jumbotron">
        <div class="container">
          <div class="row">
            <div class="col-8">
                <h1 class="display-4">DefBox</h1>
                <p class="lead">This is a basic web app to print downloaded parts data from partsbox.io as labels.</p>
            </div>
            <div class="col-4">
                <img class="img-fluid" src="assets/img/dpeLogoBlack.png"/>
            </div>
          </div>
        </div>
        <hr class="my-4">
        <p>Drag the downloaded csv data here or select it with choose file.</p>
        <input class="btn btn-primary btn-lg" type="file" name="file" id="partsbox_csv_file"/>
      </div>
      <button type="button" class="btn btn-success btn-lg btn-block" onClick="CheckEnv()">Print Labels</button>
    </div>

    <div class="upload fs-upload-element fs-upload fs-light"></div>
  </body>
</html>
All of that gives us a simple but functional web page that does all we need it to.

With the web page done, we need to do the behind the scenes code to actually parse the CSV and tell the printer to create a label. One of the first things is define a global variable var df;. This is so we can attribute dymo.label.framework to it, due to it being used frequently, so this saves time and formats the code nicely.
Then, as mentioned earlier, the first function we set up is CheckEnv(). Here we check that there's a printer connected otherwise throw an alert to the user (quick albeit alerts aren't the nicest UX). If everything is okay then call the next function to get the CSV file input.
function CheckEnv() {
  df = dymo.label.framework;

  var printers = df.getPrinters();
  if (printers.length == 0) {
    alert("No DYMO printers are installed. Install DYMO printers.");
    return;
  }

  if (!printers[0].isConnected) {
    alert("DYMO printer is not connected.");
    return;
  }

  GetFileInput();
}
The second if to check if the printer is connected (assuming there's only one printer connected which we do throughout) might seem redundant compared to the first check but, upon testing, getPrinters() will be successful after first time it runs even if you unplug the printer. Checking isConnected on the printer actively checks the connection.
For getting the file input we can use FileReader. We read the uploaded file name using the partsbox_csv_file id, pass it into a FileReader, and the determine two functions for it. One for successfully reading the file and one for it throwing an error. Finally we have to actively start reading the file to get one of these functions to fire.
function GetFileInput() {
  // Read the 'uploaded' file name and pass into file reader
  var fileInput = document.getElementById("partsbox_csv_file").files[0];
  if (fileInput == undefined) {
    alert("No uploaded file detected.");
    return;
  }
  const reader = new FileReader();

  // Error function for reading the file
  reader.onerror = function(error) {
    console.log(error);
    alert("Error with uploaded file");
    return;
  };

  // Success function for reading the file
  reader.onload = function(event) {
    var csvString = event.target.result;
    var csvArray = ConvertCsvStringTo3dArray(csvString);
    GetDYMOPrinters(csvArray);
  };

  // Start reading the file
  reader.readAsText(fileInput);
}
On success, due to reading the file input as a string, we need to convert the string to an array we can use. This function initially splits the string by each newline (as each line in the CSV represents the info on one part from partsbox) and adds it to an array newLineArray. Then for each line in the array it;
- Removes the quotes at the start & end
- Splits it by each section into an array using
split('","') - Pushes it to
csvArray
Finally, we remove the first element in the array as this contains the CSV headers, which we don't want to print.
function ConvertCsvStringTo3dArray(csvString) {
  // Split by newline to get each line of the csv in an array
  var newlineArray = csvString.split('\n');
  var csvArray = [];

  // Split each line into its individual components
  newlineArray.forEach(line => {
    if (line !== "") {
      // Remove the quotes on each end of the line
      contentLine = line.substring(1, line.length-1);
      splitLine = contentLine.split('","');
      csvArray.push(splitLine);
    }
  });

  // Remove the first line of csv headers
  csvArray.shift();
  return csvArray;
}
From here we setup what we need to print the label. This includes getting the printer and loading the label XML (as .label format). Then for each line in the CSV array we call the PrintLabel() function. Here we replace the label components (using the reference name we setup on each component earlier) with our CSV data before then creating the print settings, and firing off printLabel to send it to the Dymo printer.
function GetDYMOPrinters(csvArray) {
  // Get the first printer
  var printer = df.getPrinters()[0].modelName;

  // Load the label layout file
  var currentLoc = window.location.pathname;
  var currentDir = currentLoc.substring(0, currentLoc.lastIndexOf('/'));
  var labelDir = "/assets/layouts/LabelLayout.label";
  var labelUri = "file:///" + currentDir + labelDir;
  var label = df.openLabelFile(labelUri);

  // For each line in the csv, print a label
  csvArray.forEach(csvLine => {
    PrintLabel(label, csvLine, printer)
  });
}

function PrintLabel(label, labelInfo, printer) {
  // Replace the label objects with the CSV data
  // 0) Name 1) Description 2) Footprint 3) Manufacturer 4) MPN 5) Storage 6) Total Stock 7) URL 8) Meta-Parts
  console.log(labelInfo);
  label.setObjectText('PF_DESCRIPTION', labelInfo[1]);
  label.setObjectText('PF_MPN_BARCODE', labelInfo[4]);
  label.setObjectText('PF_PART_TITLE', labelInfo[0]);
  label.setObjectText('PF_MFN', labelInfo[3]);
  label.setObjectText('PF_LOCATION', labelInfo[5]);
  label.setObjectText('PF_QRCODE', labelInfo[7]);

  // Set the print options
  var labelXml = label.getLabelXml();
  var printQuality = df.LabelWriterPrintQuality.Auto;
  var paramsXml = df.createLabelWriterPrintParamsXml({ copies: 1, printQuality: printQuality});

  // Print
  df.printLabel(printer, paramsXml, labelXml);
}
If this is all done successfully, you should get a printed label (or a few) when running through the web page!

